[September 5, 2021]
Updated and confirmed working with
- Beat Saber 1.17.0
- Custom Avatars 5.2.8
- Unity 2019.4.28
There’s a really neat tool for creating personalized avatars for VR games called ReadyPlayerMe. Getting an avatar set up is pretty slick and it supports games like VRChat right out of the box.
One game that isn’t officially supported is Beat Saber, my personal favorite VR game. It’s not surprising that it isn’t officially supported because you need a modded version of the game with Custom Avatars installed to even have custom avatars in the game.
Fortunately, you can export a model directly from ReadyPlayerMe for usage anywhere with the right amount of effort.
Download the Unity project

To get started, download the BeatSaberCustomAvatars Unity project from my GitHub. It uses Unity 2019.4.28 which you can get from the Unity download archive.
Once you open the project, you’ll find a TemplateReadyPlayerMe folder under Assets and a TemplateReadyPlayerMe scene that we’ll be working in.
Export the model from ReadyPlayerMe
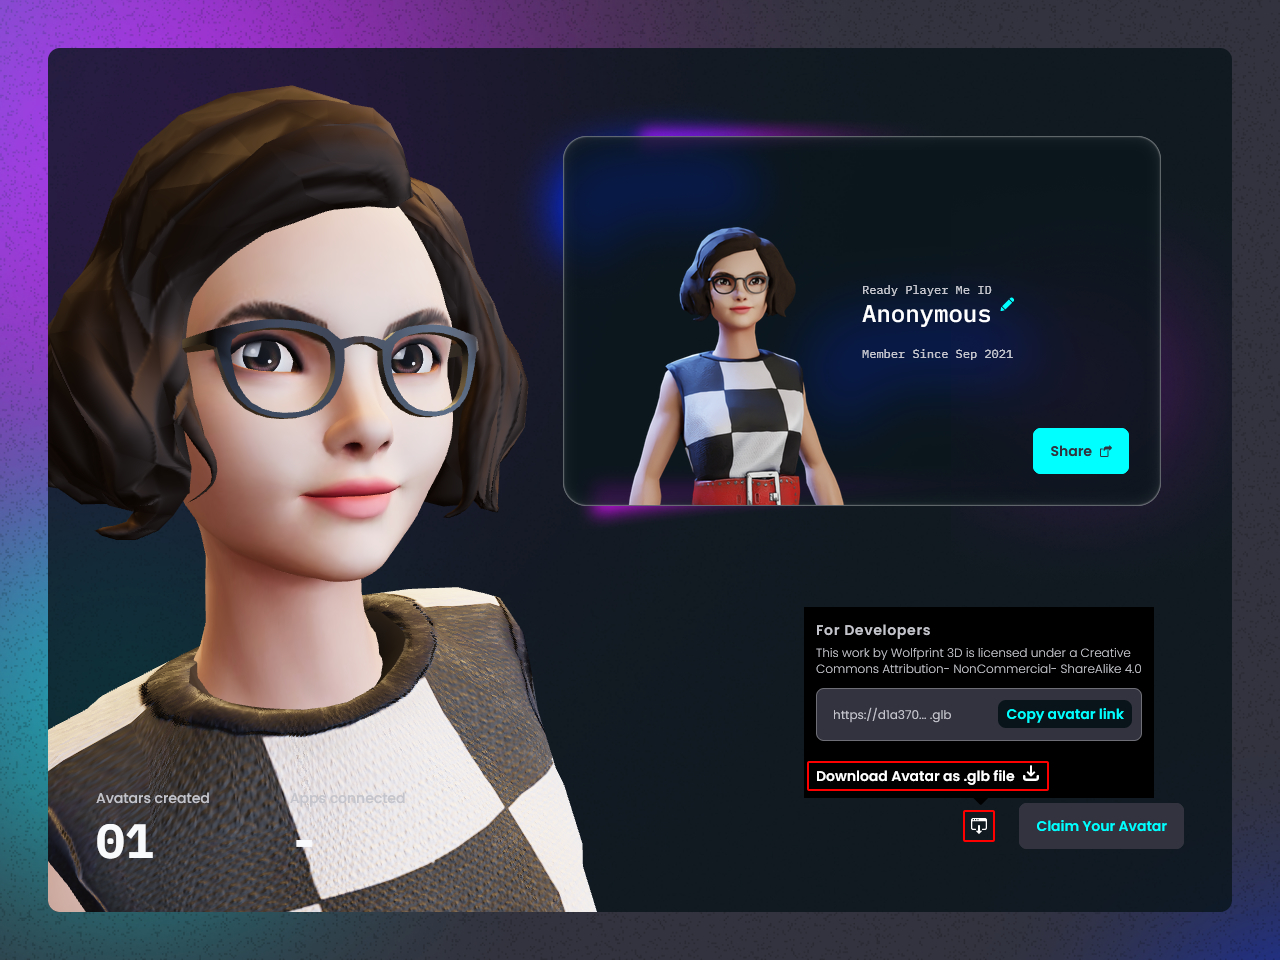
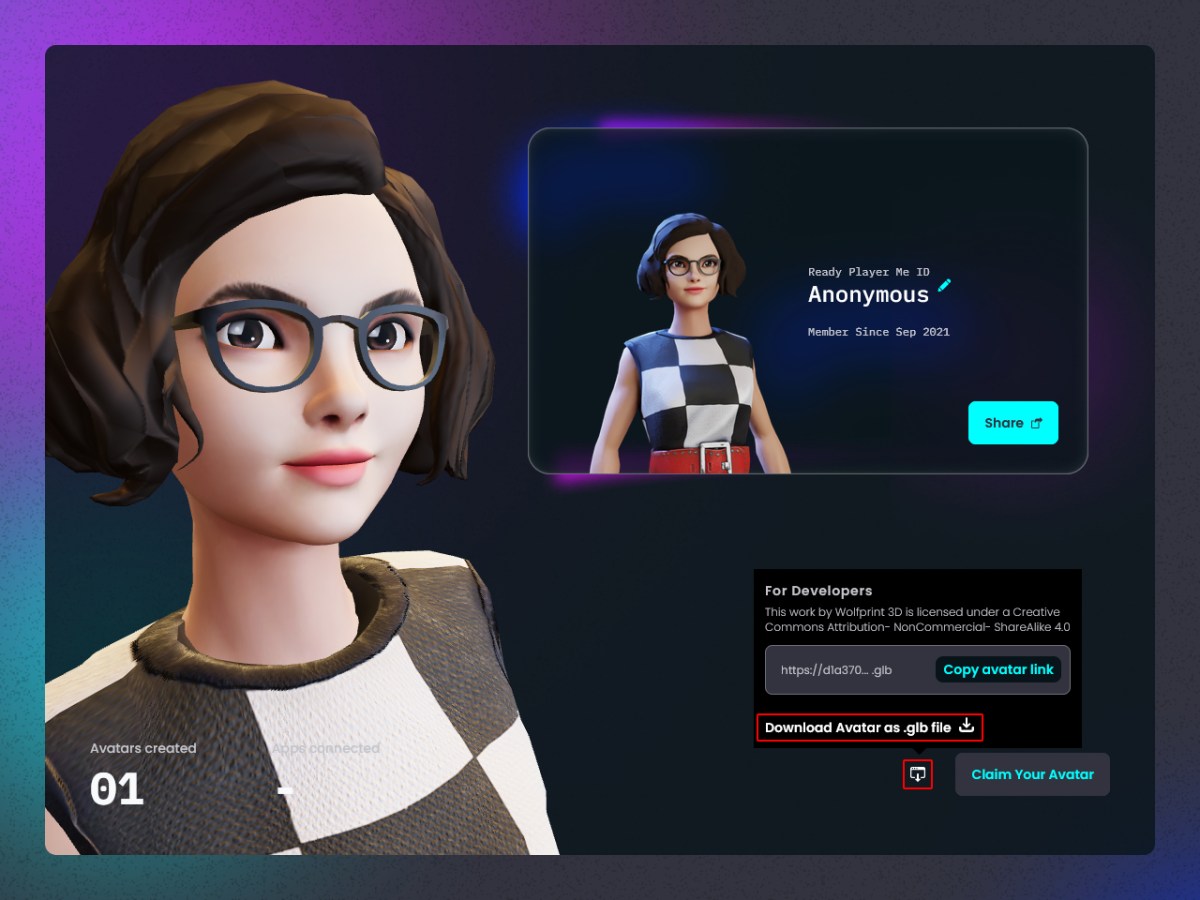
Create your avatar on ReadyPlayerMe and select “Download Avatar as .glb file”. Save the file into the TemplateReadyPlayerMe folder. glTFUtility is included in the project and can read the .glb file type.
What’s with the Creative Commons thing?
Wolfprint 3D (who made ReadyPlayerMe) uses CC BY-NC-SA 4.0 license on their models. The avatar that we’re making here must use the same license (SA = ShareAlike). You can’t use it for commercial purposes (NC = NonCommercial). And you have to credit the author (BY = Attribution). The Attribution point will be important for later.
Override the shaders

With your custom avatar imported, select it in the Project panel. Then in the Inspector panel, under Import Setting > Shader Overrides, override the shaders like shown in the sample model.
| Metallic | BS-glTF-Metallic.shader |
| Metallic Blend | BS-glTF-Metallic-Dither.shader |
| Specular | BS-glTF-Specular.shader |
| Specular Blend | BS-glTF-Specular-Dither.shader |
Configure your avatar
With the model successfully imported and shaders overridden, the remaining steps mostly follow the official custom avatar guide, but there are still a few differences for ReadyPlayerMe avatars.
Add your avatar to the scene
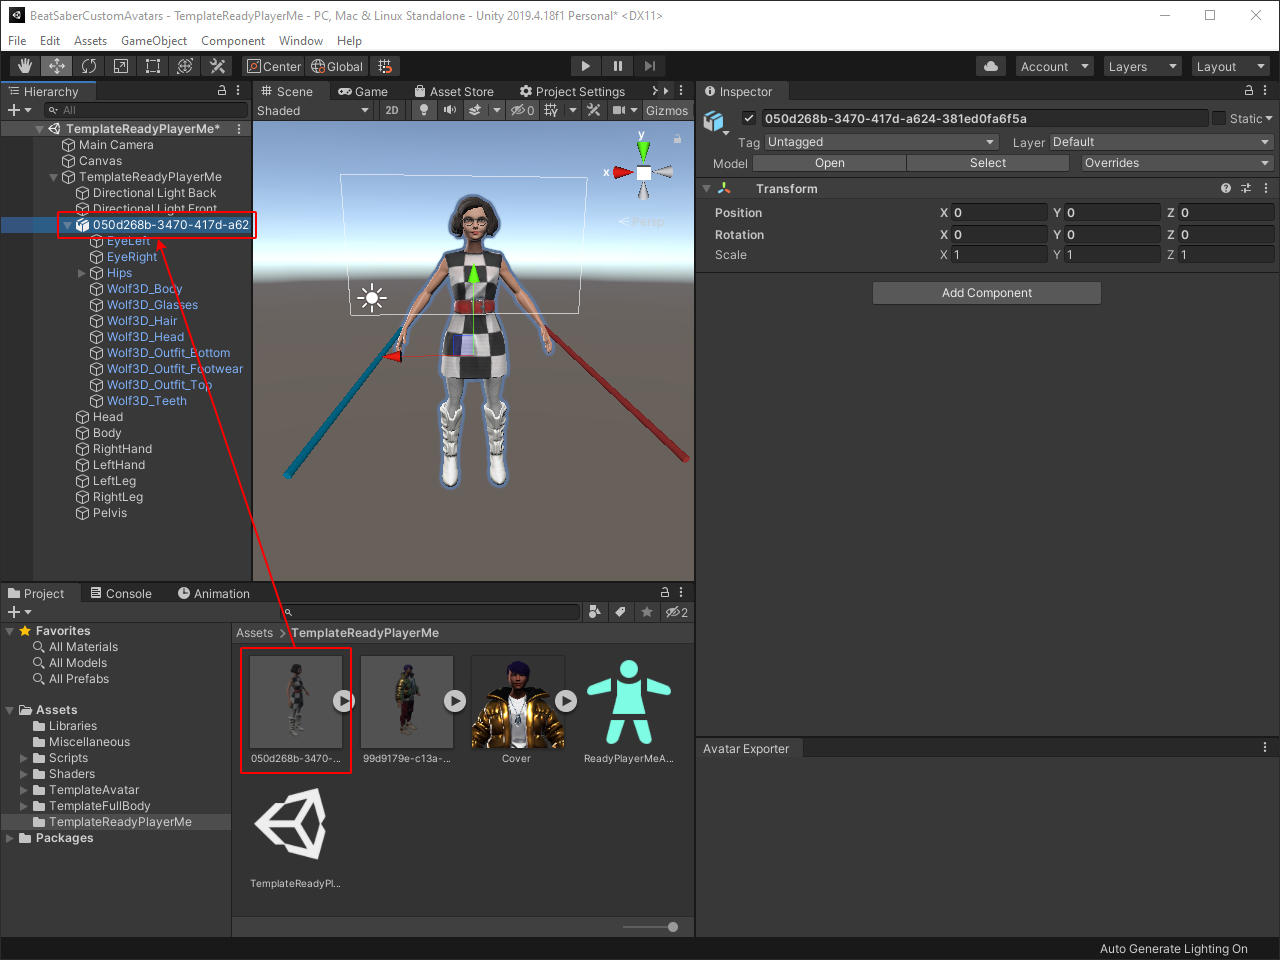
Delete the old avatar from the scene and drag your custom model from the Project panel to where the old avatar was in the Hierarchy panel.
Add the Animator component
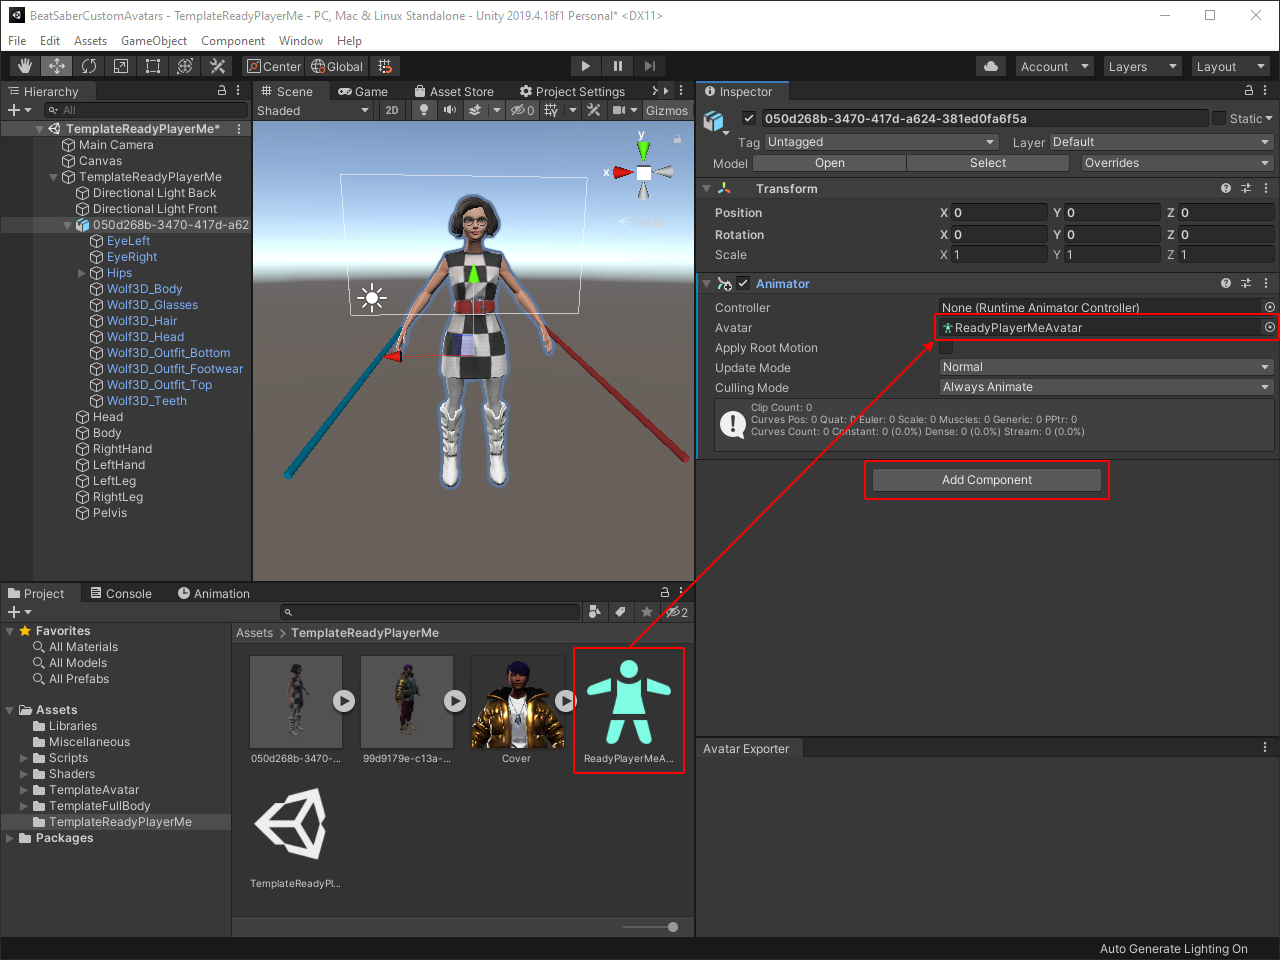
Select your model in the Hierarchy panel and in the Inspector panel add an Animator component (not to be confused with the Animation component) by clicking the Add Component button at the bottom of the panel and searching for Animator.
Then drag the ReadyPlayerMeAvatar from the Project panel into the Avatar section of the newly added Animator component. The next two components take advantage of the Animator component, so make sure you get it set up first.
Set up the VRIK Manager

In the same way you added the Animator component, also add a VRIK Manager component. The default values for the component are fine.
Depending on your model, you may need to adjust the positioning of the Head, Right Hand, Left Hand, Left Leg, Right Leg, and Pelvis GameObjects. It’s helpful to position them in orthographic mode by using the Scene Gizmo in the top right of the Scene panel.
The head should be positioned slightly in front of the eyes. The hands can be positioned using the saber gizmos—make sure they are enabled in the Gizmos menu in the top right of the Scene panel if you don’t see them. The pelvis and feet are only used if you have full-body tracking. You can use the template model as a reference for where they should be positioned.
For the model I used in this guide I only had to adjust three of the positions compared to the template model.
| GameObject | X | Y | Z |
| Head | 0 | 1.6288 | 0.1554 |
| Right Hand | 0.428 | 0.9508 | 0.171 |
| Left Hand | -0.428 | 0.9508 | 0.171 |
Pose the hands
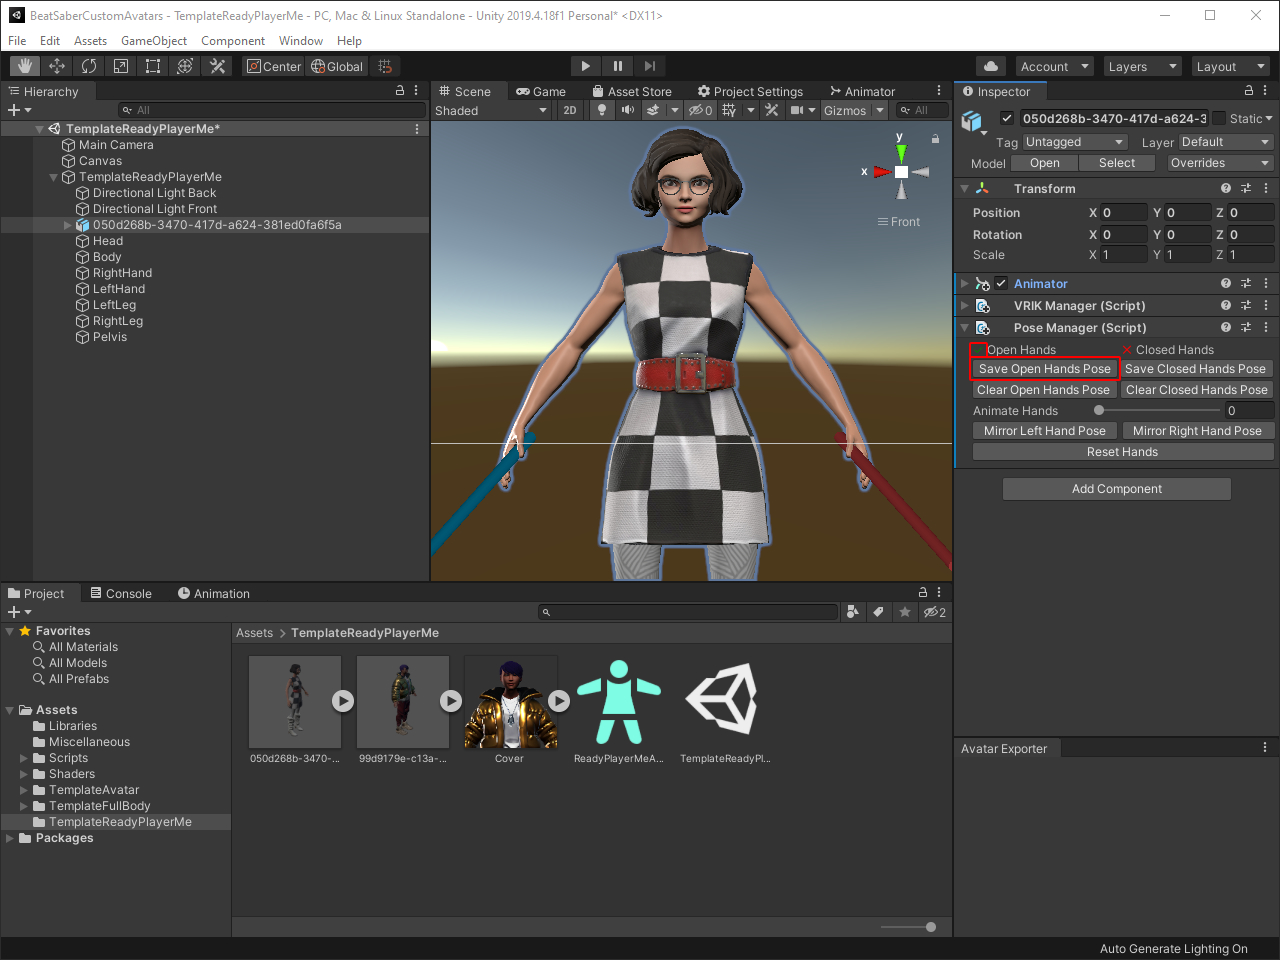
Next, add the Pose Manager component to your model the same as the other components. And first thing after adding the component, click the Save Open Hands Pose button and look for the green check mark.
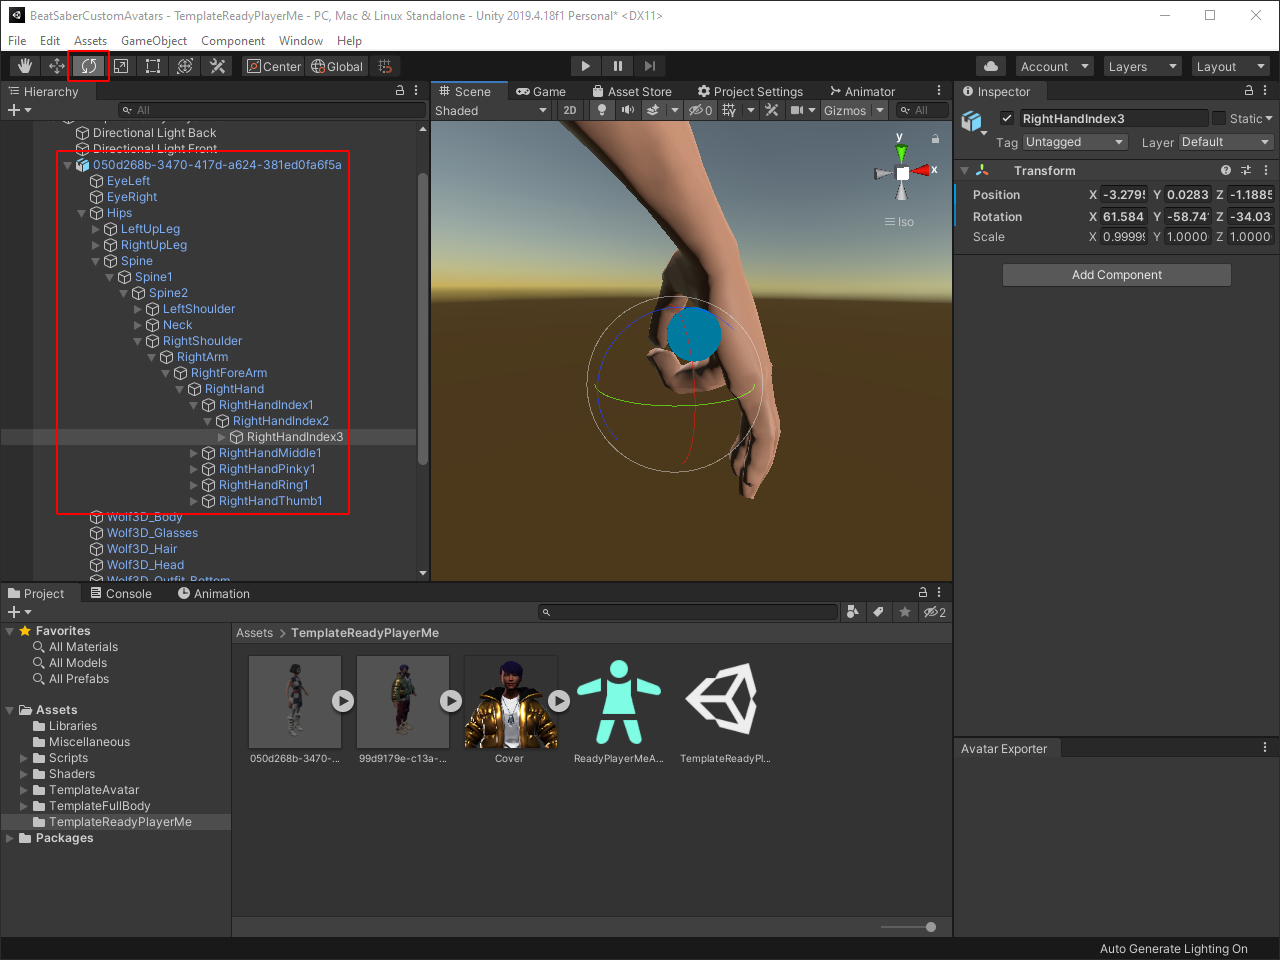
Next, use the rotation tool on each of the fingers of the right hand as seen in the Hierarchy panel. I find it helpful to use the orthographic view again and align with the saber and the back of the hand.

Once you’re happy with how the fingers on the right hand look, go back to the Pose Manager component on your model with all the buttons. Click the Mirror Right Hand Pose button to copy over the changes to the left hand, and then click the Save Closed Hands Pose and look for the green check mark.
Configure lighting (Optional)
By default, the TemplateReadyPlayerMe scene has two lights to illuminate the model. You can optionally adjust those lights however you like or add new lights—they will be exported with the avatar. Be aware that adding too many lights will reduce performance, and there is a hard limit to the number of lights that Unity will render, depending on quality settings.
Export from Unity
Everything is nearly ready—just a few more steps.
Configure first person exclusion

At this point, if you ever want to use the first-person mode, you’ll want to add the meshes that make up the head to the First Person Exclusion component on the TemplateReadyPlayerMe GameObject.
ReadyPlayerMe models have at least five head mesh parts and maybe more, depending on the accessories that you choose. Set the Size field to the number of head mesh parts your model has. Then, drag each of the head mesh parts into the numbered elements.
Set the Avatar Descriptor
You’ll want to add a unique name to the model that you create, and add your name as the author.
Because of the model’s CC BY-NC-SA 4.0 license, if you plan to upload it anywhere (like ModelSaber) it’s probably a good idea to include a note of where the model was sourced from: “Model by ReadyPlayerMe” or “Model by Wolfprint 3D” in the Author field.
Update the cover image

Next up is updating the cover image. Just select the Main Camera in the Hierarchy panel, scroll down to the Cover Helper component, and click the Capture button.
The resulting cover image looks dark compared to what’s shown in the Scene panel. Something in the Cover Helper script needs to be updated to fix that. If the darkness bothers you, you can manually screenshot the scene and use that image instead.
Exporting for Beat Saber

Finally, everything should be ready to go for export. I have my Avatar Exporter panel docked to the bottom right, but you may need to open it by going to Window > Avatar Exporter. Then you can just click the Export button and save it to CustomAvatars inside your Beat Saber folder (C:\Program Files\Steam\steamapps\common\Beat Saber\CustomAvatars for Steam on Windows).
Closing Thoughts
ReadyPlayerMe avatars don’t have bones for hair or clothing. So, unfortunately, you can’t add dynamic bones to default imported model. If you want to add them, you’ll have to create the bones in Blender or another 3D modeling program at which point you can just export .fbx like normal.
Facial animations can theoretically work—ReadyPlayerMe has blend shapes available—but I haven’t taken the time to figure them out yet. The best place to go for now to learn about animations is the official BSMB Custom Avatars Guide.
Lastly, if you have any issues with the code in this guide, feel free to comment or open an issue on my fork of the BeatSaberCustomAvatars project on GitHub. Thanks!
